Dear FutureMe,
Today would be a good day to do a quarterly inventory.
How is your personal life going?
How is your work life going?
How is your Volunteer Service life going?
Future Me
Personal Life
I’m in a little bit better mood this quarter, mostly due to taking on another Volunteer Service position, and listening to a book. I did have a lot of fun with MPD (Music Player Demon), although that went pear-shaped more recently.
Home Air Conditioning
When I was in my 20’s, I lived in a place that had only a swamp cooler. Augusts, here in the Central San Joaquin Valley desert, will often get to 110 °F (43 °C). With only a swamp cooler, that was not fun. Now that I’m in my 60’s, I want refrigeration. Seriously.
Although I have the pieces for a sun shade for my western facing glass door, I haven’t made any progress on building it. My air conditioning unit is doing poorly, too, so that is a bummer. Back in December, Grant’s Air Conditioning replaced the control board (computer). This new one appears to have a setting where if the desired temperature cannot be met after some period of time, it goes into failure mode. It will kick the refrigeration compressor on for ten seconds, and then stop. It tries that every five minutes. Meanwhile, inside the home, the internal temperature keeps rising. Eventually, the outside cools off enough to where the differential is back within range, and full cooling begins again.
Okay: a backstory. Back in February, Grant’s Air Conditioning replaced a huge capacitor. I think its job is to jump-start the blower. The thing is almost the size of my fist. Also, a while ago before, I started having weird electrical problems in the house. My UPS (uninterruptible power supply / battery backup) in my master bedroom started kicking on, and reporting out-of-bounds power levels from street power.
My theory is that something in the blower has changed, and this jump-start capacitor is draining to zero as it jump-starts the blower. It uses so much power in this process that my UPS detects the out-of-bound condition, and kicks in to protect my gear. Or in the other direction, it pulls so much power to recharge, that there’s a spike when it finally fills up. Either power overload or underload happens, and the UPS kicks in. I hear it clicking and the front-panel displays an error condition.
The first time I started seeing this UPS behavior was during the winter. Then in February, the air conditioning / heating unit failed, and Grant’s came out and fixed the capacitor.
About two months ago, the UPS started acting funny again. The air conditioning also started the failure mode where it only runs the refrigeration for ten seconds and quits. I had to run off to a meeting, so in desperation I forced the blower into always on mode, and left. By the time I got back, the refrigeration was back on. I left the blower in always on mode.
Days later, I notice that the UPS events have stopped. The blower has been running for a couple of months now. If the blower doesn’t need to be jump-started, the capacitor doesn’t get energized (it seems to me).
That was a long story about my fear that my air conditioning unit is going to need major service to repair / replace the blower. If not that, another $240 for another capacitor that won’t last very long.
Food and food costs
Inflation is always bad, and this time is no different. I very much need to avoid eating out at fast-food or restaurants; my financial advisor would like me to have $25,000 in the bank when I retire. I’m at around half that, and I hope to retire in twelve and a half months. There for a while, I was cooking / heating frozen pizzas, but I was clearly gaining weight. So then I switched to breaded chicken fillets from the delicatessen portion of Winco (the best grocery store we have). But the price of those has been going up too, and, they seem to make me really drowsy on my lunch break. I suspect there is too much deep-fat fried breading on them. I wasn’t gaining weight with them, but I wasn’t losing any either.
Now I’m trying frozen burritos, although they don’t digest as well as the breaded chicken fillets. My preference would be to buy steak. But I remember when New York Strips were $6 per pound, and at $15 per pound now, I’m out.
I’ve had to add more fast-food stores to my boycott list due to inflation. There is no way I can justify going to them anymore. I was bummed that the one place (which has high-quality tacos) has been losing customers, and last night when I drove by to check on their Sunday Taco Special, they’d raised the price a dollar. Long term, I expect they will go out of business.
Other personal life items
I still need to redo my personal mail server. This is yet-another task that would be fun if I had a week to do it. For the Juneteenth holiday and the use-it-or-lose-it-Personal-Holiday-Allowance Friday, I did have four days in a row available. However, I was working on my MPD project, and it didn’t go well.
MPD project (Music Player Demon)
One thing that was super fun was buying a Raspberry Pi Zero and adding a HiFi Berry DAC Zero, and configuring it. It went about as beautiful as it could. Now, in my Work-From-Home office, I don’t need a laptop running Snapcast client; I’ve got this hooked into my receiver instead:
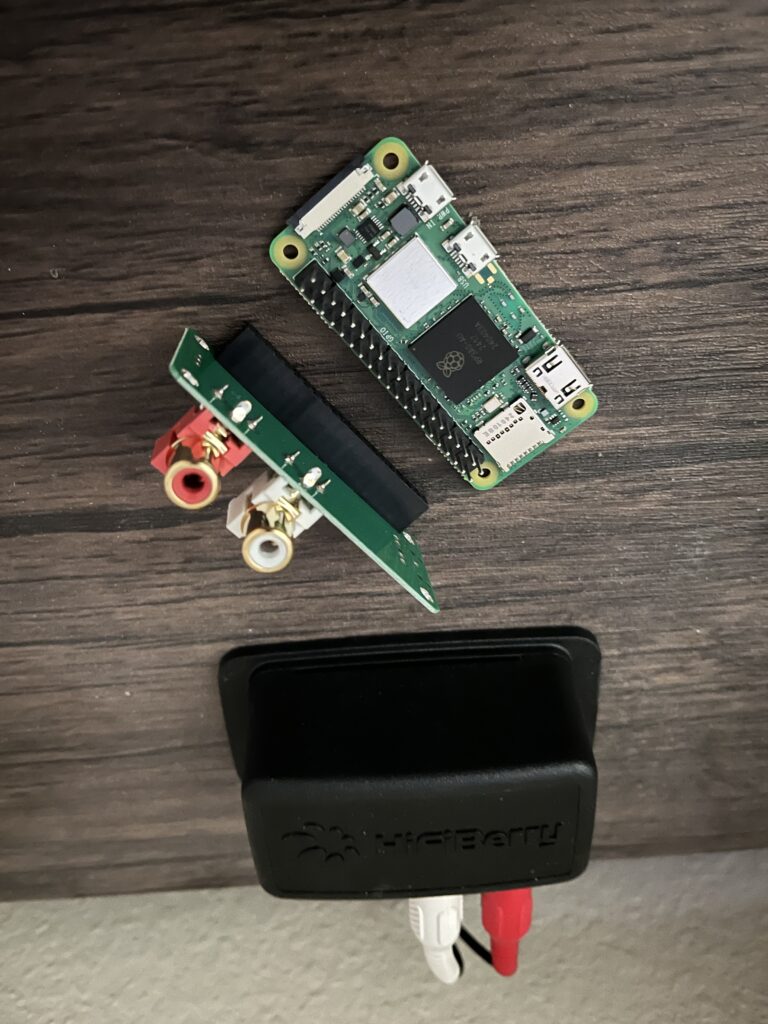
Pictured here is a disassembled Raspberry Pi Zero and a HiFi Berry DAC Zero, in addition to the powered on unit in production. The Raspberry Pi Zero is about two keys wide and four keys long if laid on the numeric keypad of your full-size keyboard. I was happy enough with the streaming audio sink that I bought two more kits; the unassembled pieces shown are from those kits.
I tried writing Perl code to manage MPD using AI. On the one hand, it didn’t take very long at all to crank out 7,000 lines of Perl, which mostly did do what I wanted. But it wasn’t fully what I wanted. Looking at the code, I got the idea that it was putting too much into one branch of one loop, and that trying to break it into more logical pieces was the right thing to do. I went back to manual mode, and have made a mess of it. Sure, my various functions are in more logical places, but the differences between what I think I want versus what I write make it slow-going. I also managed to clobber previously set alarms, so I’m actually worse off now than before. Oof.
Listening to a book: Catch-22
I subscribe to a couple of journalists who do a weekly show with an hour and a half of current events and half an hour on a book they are reading. They’ll propose a book to each other, and if the other hasn’t read it, that will become the book. A couple of weeks ago, one of them said that Catch-22 by Joseph Heller was the funniest book written in the last 80 years. Maybe he said “one of the …” but either way it was high praise.
I went ahead and paid Audible.com for a copy. Yes, this book is terribly funny.
I remembered a moment from 45 years ago, when my best friend Craig had told me he’d just read the funniest book ever, Catch-22, and that I should read it. I wasn’t fond of the idea because what I knew about the term Catch-22 was that it is always a “lose-lose” situation. Looking back, I suppose my thinking was that was the book would inure me, and that I’d become more accepting of Catch-22 situations. For whatever reason, I took a pass, and didn’t read the book. Here, 45 years later, this book does make me smirk a lot. I don’t regret not reading it 45 years ago, but I think I would have enjoyed it back then too. I don’t know, though: back then I was in high-school, and hadn’t experienced a lot of bureaucracy. Today I have 35 years of that in my history, so maybe I can laugh easier about it now.
Work Life
If $18,000 fell out of the sky and into my lap, I would retire tomorrow.
I’m counting down: twelve months (plus a few weeks) to go.
One of my co-workers died. I’d been working with him for more than twenty years. I had tried to let him know that my life got vastly better when I stopped drinking alcohol; but, he didn’t want to hear it. I know that if someone doesn’t want to stop, there is no way to convince him or her otherwise – and attempting to do so anyway causes the alcoholic to dig their heels in deeper. Rest in peace, Joe.
Volunteer Service Life
I did add one more service commitment this quarter: two times a month, I’m with other members in a meeting in our newest homeless shelter. It’s an interesting place: they have a dog kennel. Many people who have been long-term homeless have only one companion: their dog. So if they have to choose between a shelter that doesn’t allow pets, versus remaining homeless, they’ll stay homeless. This newest homeless shelter solves that problem by building in a dog kennel and a bicycle lockup, so that people who do get a bicycle don’t get it stolen.