One of the pieces of bad advice I got while trying to diagnose the Let’s Encrypt problem was to reset my Nextcloud File Sync client connection. No big deal, they said, just recreate the connection.
BY THE WAY (said no one) WE’RE GOING TO TRASH FILES WAITING TO SYNC.
Well, I’m being a bit overly dramatic here. The files aren’t syncing, but I do see them on the laptop they were transferred to. So they are not lost, which is important because they were audio recordings of speakers from Wednesday the 24th and Sunday the 21st. But the sync process that worked before, now isn’t. It reports everything is fine, but the files are not copying across.
Admittedly, the way I’ve done things is a little unusual. It’s annoying that my setup broke when Let’s Encrypt changed things, but I understand they can’t test every setup. Still, I was caught off guard and spent a couple of days trying to figure out what went wrong.
What happened is that Let’s Encrypt started issuing certificates where the chain of trust goes up to a new root CA certificate.
That new root CA certificate is not in any of the standard root certificate bundles any of my machines are configured with (yet).
For web browsing clients, this wasn’t a problem, because web browsers work really hard to climb the chain of trust and verify it. They want to look at certificate revocation lists too, so climbing the chain of trust was something they were going to do anyway.
But me, I’ve got Thunderbird configured to pull my address book from my Nextcloud server. Thunderbird is not a web browser. Thunderbird gets really pissy when climbing the SSL chain of trust fails. This is a feature, not a bug!
DITTO the Nextcloud File Sync client.
DITTO (temporarily) iPhone could not sync to Nextcloud via CalDAV. When I didn’t know sync was broken, I added an appointment to my iPhone during a phone call. It never synced and then completely vanished. I’m lucky my brother asked me when the appointment about my mom in the nursing home was supposed to be. I went looking and found the appointment missing from everywhere (so I had to telephone the social worker to find the date and time again) (now CalDAV sync works again).
Further complicating the matter is that I’m getting my wildcard Let’s Encrypt certificates via an ACME client on pfSense. The pfSense scheme works well; every six months I have to update the API key for permission to dink with DNS, but, it works well. After automatically renewing the wildcard cert, pfSense can also run a command to copy the cert files to another machine. I use that machine to hold the certs that I could use on other hosts in my network.
Diagnosing this trouble, the suggestion was to edit the pfSense ACME configuration to add “Preferred Chain: 'ISRG Root X1'” – which I did, but it doesn’t work. During the Issue/Renew phase, I could see the command line that the acme.sh script was running, and it included –preferred-chain 'ISRG Root X1' and everything appeared to work correctly. But when I download the CA file, it says it is:
subject=C=US, O=Let’s Encrypt, CN=YR1 issuer=C=US, O=ISRG, CN=Root YR
I specifically asked for X1 and I got YR. Sigh.
I thought I had it solved by specifying SSLCertificateChainFile in the Apache config, but Thunderbird is still barking at me.
It does appear that adding SSLCertificateChainFile to the Apache config did fix the Nextcloud File Sync client.
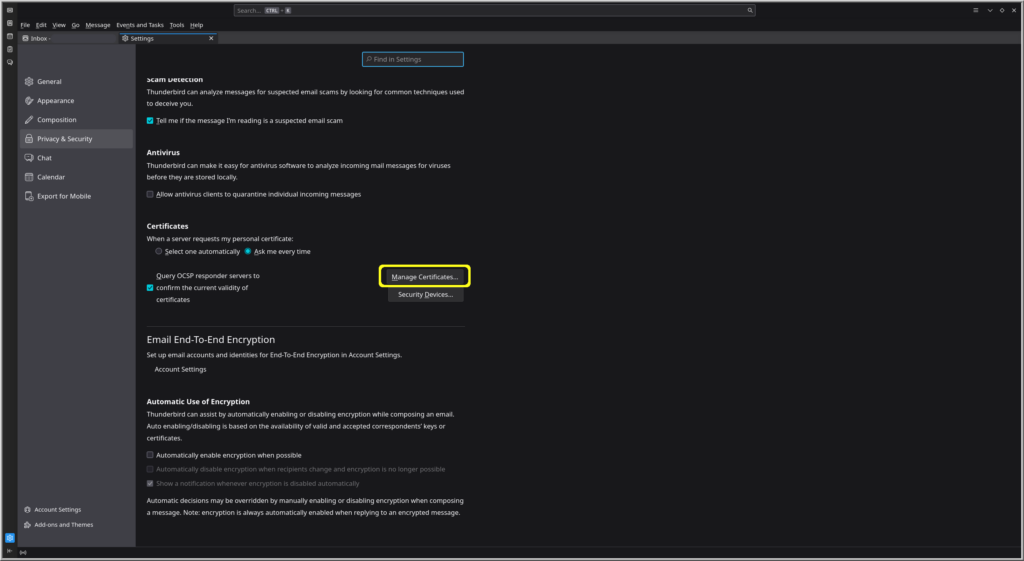
The Thunderbird fix was to add the .ca file to the authorized servers certificate store:
Thunderbird > hamburger / pancakes menu in the upper right corner > Settings > Privacy & Security > Security > Certificates:
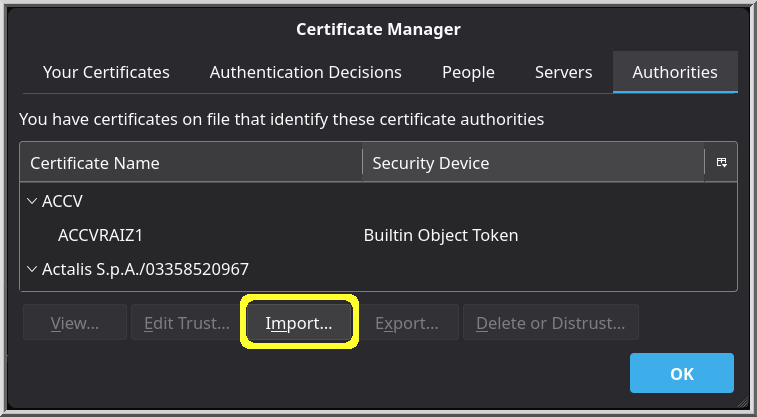
Then, on the Authorities page, choose Import. I had to change the drop-down in the file picker to allow all files, because .ca files aren’t normally something one would (have to) import.
It is time to renew my wildcard SSL certificate for an internal domain I have, and here are the steps I went through to solve it. When I say internal domain I’m referring to a DNS domain that exists on the public Internet, but which wholly and only points to the IP address of my home broadband router. That router has pass-through enabled, so that essentially, my pfSense box is my presence on the Internet for everything inside my home.
I turned off HAProxy so that pfSense wouldn’t be sending the challenge traffic to the only internal server I put out there. The internal server, Nextcloud, doesn’t play nice with others; in order to keep things consistent, they want it to be an appliance where the only stuff running on the box is their code. Okay, I get that. This wouldn’t be so annoying if it wasn’t bug-riddled junk that is in a huge rush to implement new features. Can you say “AI”? But I digress.
I created a new Linode API key in case the problem was that the old API key didn’t have access. Well, the first new key had the wrong selector, and resulted in “Your OAuth token is not authorized to use this endpoint”.
The problem is that the pfSense script is trying to generate a challenge key and insert it into a web server that doesn’t exist. The pfSense web admin portal is that web server. When I turned off HAProxy, that should have opened it up. It did, but I couldn’t tell because the Linode API key was wrong.
Okay, maybe I need to log in to the pfSense box and manually use a generated challenge key? How to log in to the pfSense box? When was the last time I did that?
Here’s a convenient command:
history | awk '{$1="";print substr($0,2)}' | grep "ssh " | grep -v history | sort | uniq
We run the output of the history command through awk to remove line numbers, then search for "ssh " (the trailing space omits ssh-copy-id and such), run that through sort, and run that through uniq. Et voilà, and I have a list of all twelve boxes I’ve logged in to since history.
Sigh: pfSense isn’t one of them.
But this was a good exercise: I did get logged into pfSense, and did find the “Your OAuth token is not authorized to use this endpoint” problem.
I deleted the previous Linode v4 API certificate specifications, and it worked.
Time to turn HAProxy back on.
Okay, the short form is:
Generated a new Linode API access token with Domain read/write access
This probably won’t be required if the access token hasn’t expired.
pfSense > Services > Acme > Certificates > pick certificate and Edit > delete the Domain SAN list entry > Add a new Domain SAN list entry with the new Linode API access token > Save
pfSense > Services > Acme > Certificates > pick certificate and hit Renew