This was difficult, so I will provide a How-To here. The goal was to put port 8 on my switch on VLAN 4084. This is my Internet of Things (IoT) VLAN.
A prerequisite of course, is that the downlink from the router to the switch has the VLAN 4084 tag in it. For me, that will be port 1 on the switch.
Another PITA is that the Trendnet EdgeSmart switch self configures to 192.168.10.200 – and that is hard-coded. After you get a machine directly connected to it (with a static IP address), then you can configure the switch to use DHCP to put it on your main LAN. But if you find that you want to factory reset to start over, you’re going to have to go back to the static IP config on 192.168.10.x. The MAC address doesn’t show up in the router until after the DHCP inspired reboot, so you have no idea of what the new web admin interface IP address is. After the switch has rebooted, then you can go in to the DHCP leases and find out what the new IP address is. I don’t know that I would have bothered, except that the laptop I was using has a little smaller screen, and the Trendnet web interface is primitive. I could not get decent screen shots on it because of the primitive web page rendering, so I needed to access it from a bigger screen, which meant making it available on my main LAN, which meant DHCP. But I digress.
What I’m trying to get to:
First step: Modify VLAN ID 1
Here is what the web admin page looks like after a factory reset:
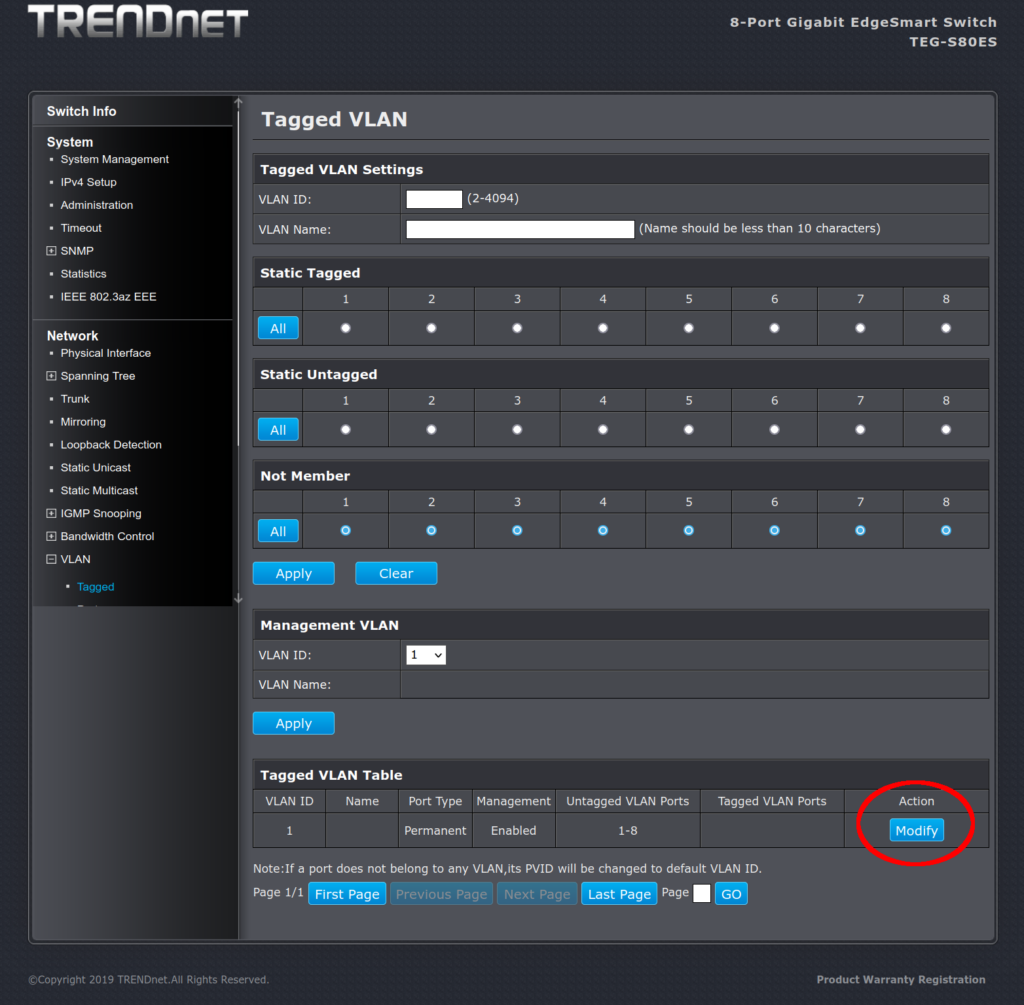
VLAN ID 1 is the default VLAN. But if you never turned on VLANs, it would never have mattered. The default configuration (out of the box) is that if a frame with that VLAN tag were to show up on the switch, all the ports on the switch would strip that tag out (“un” tagging) before putting the frame on the wire of the ports. However, port 8 is a member of VLAN 1. That would cause us trouble later.
On the VLAN ID 1 modify page, we want to set this:
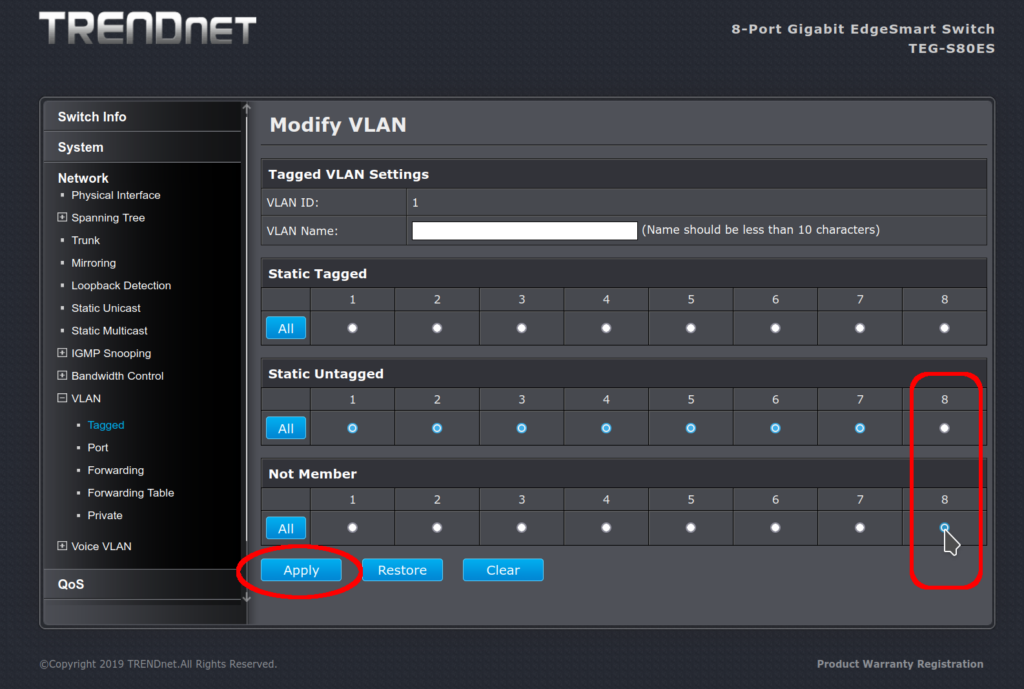
First, we move VLAN 1 to not-a-member away from static untagged for port 8. Then we apply the change. This will free up port 8 to be assigned a different VLAN later.
What it looks like after:
I may be overly sensitive here; but this is a terrible user interface. If I didn’t know better, I would think that the top part (which is really for adding a new VLAN) was telling me the current status of the ports. It is not. But it looks like all the ports are in the not-a-member group. They used a whole bunch of screen real estate to not show me what the actual status is, but what it could be if I were to proceed. I wonder if putting the “Tagged VLAN Table” at the top would be better, and not showing the grid layout of port assignments at all until someone clicked Modify or View.
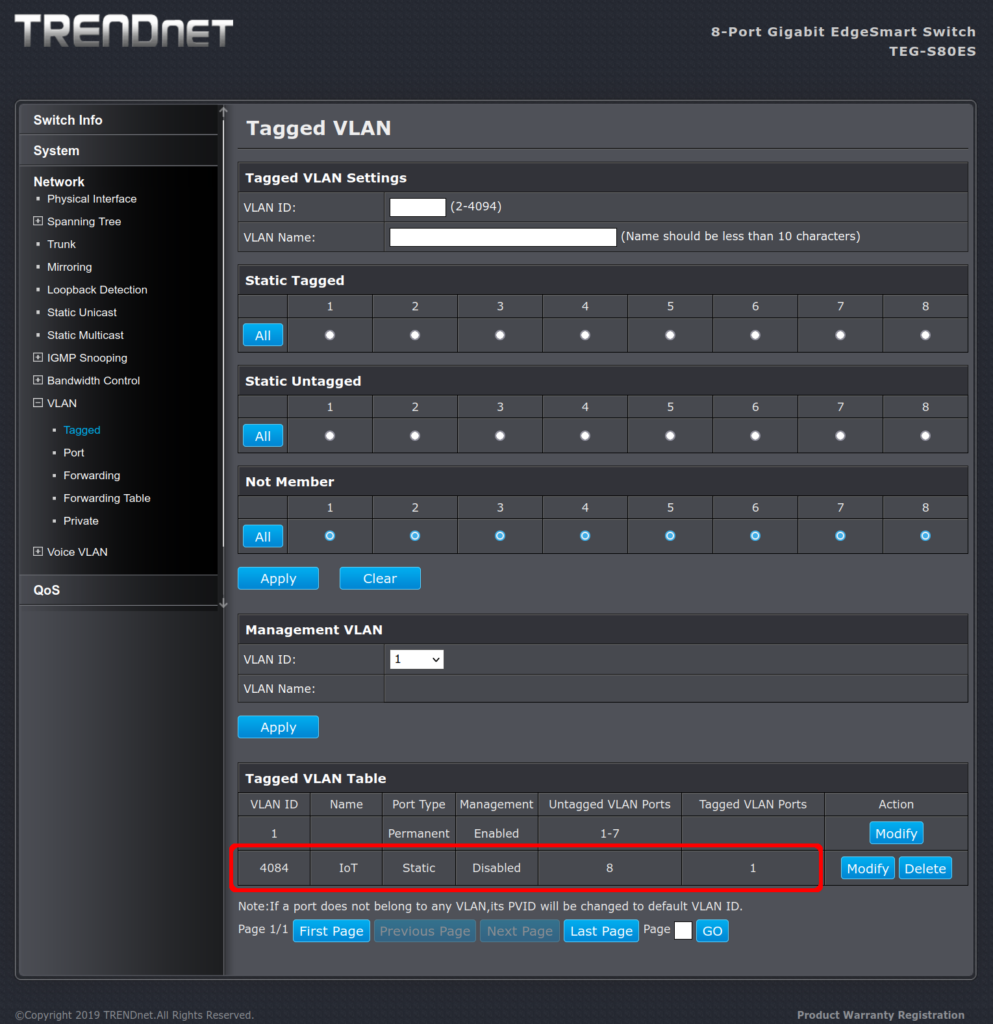
Second step: adding the new VLAN
Now we can add our VLAN 4084 with port 8 assigned:
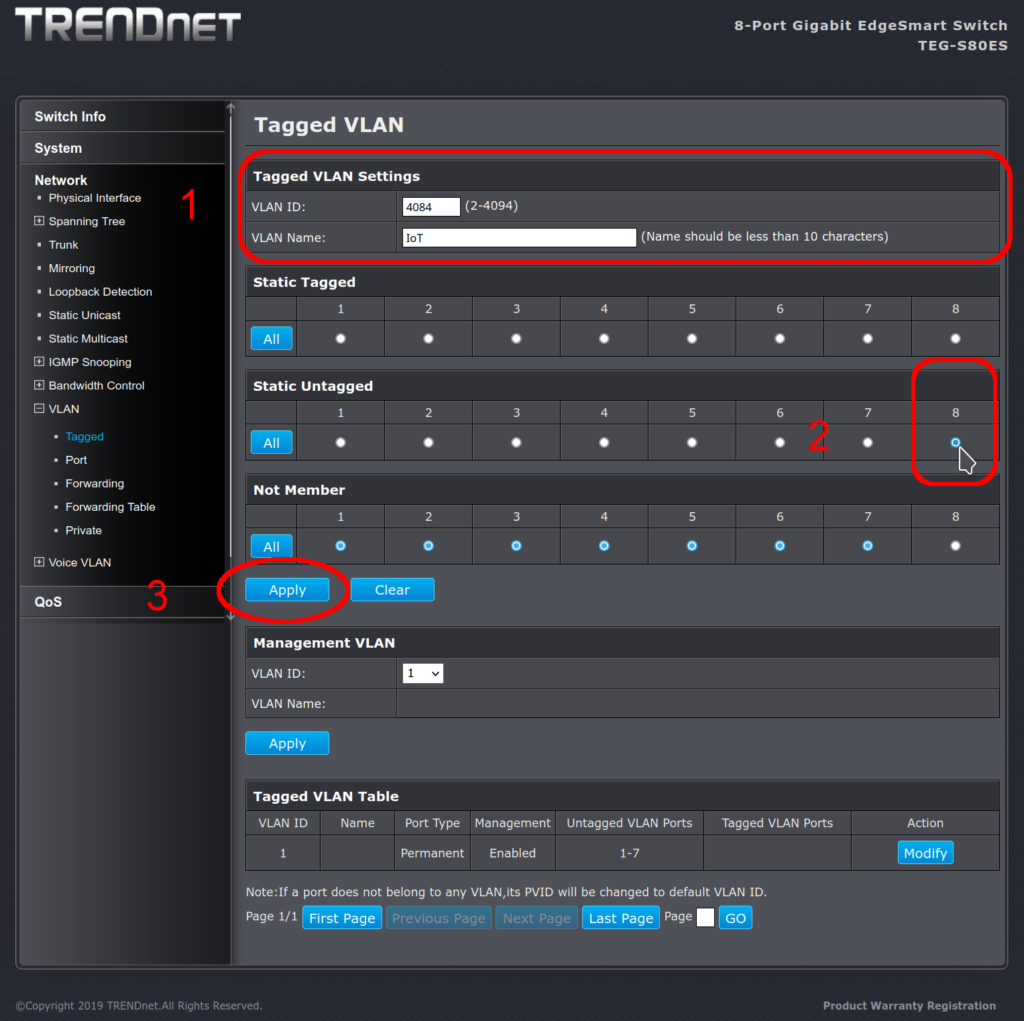
So I typed 4084 into the VLAN ID field, added the descriptive name, then clicked in the Static Untagged section on port 8, and then clicked Apply. This gave me the screen below. Note that we are not done yet.
This was the problem: the web interface uses what looks like radio buttons, so the idea that seems to be presented is that clicking on Static Untagged port 8 should move the port from VLAN 1 to VLAN 4084. But attempting to click on port 8: Static Untagged did nothing.
Behind the scene, port 8 was still a member of VLAN 1, so the admin interface would not assign Static Untagged to port 8 in VLAN 4084. It was super frustrating that clicking on port 8 static untagged did nothing: no errors, no warning – just a refusal to work with no response or feedback at all. I could put port 8 in the static tag membership, but those frames would (likely) not be understood by the IoT device. Although the interface showed me the radio button, I could not put port 8 in the Static Untagged membership. A better developed interface would have prompted me with something like “Assigning this port to Untagged will remove VLAN 1”. Okay, do that. Please.
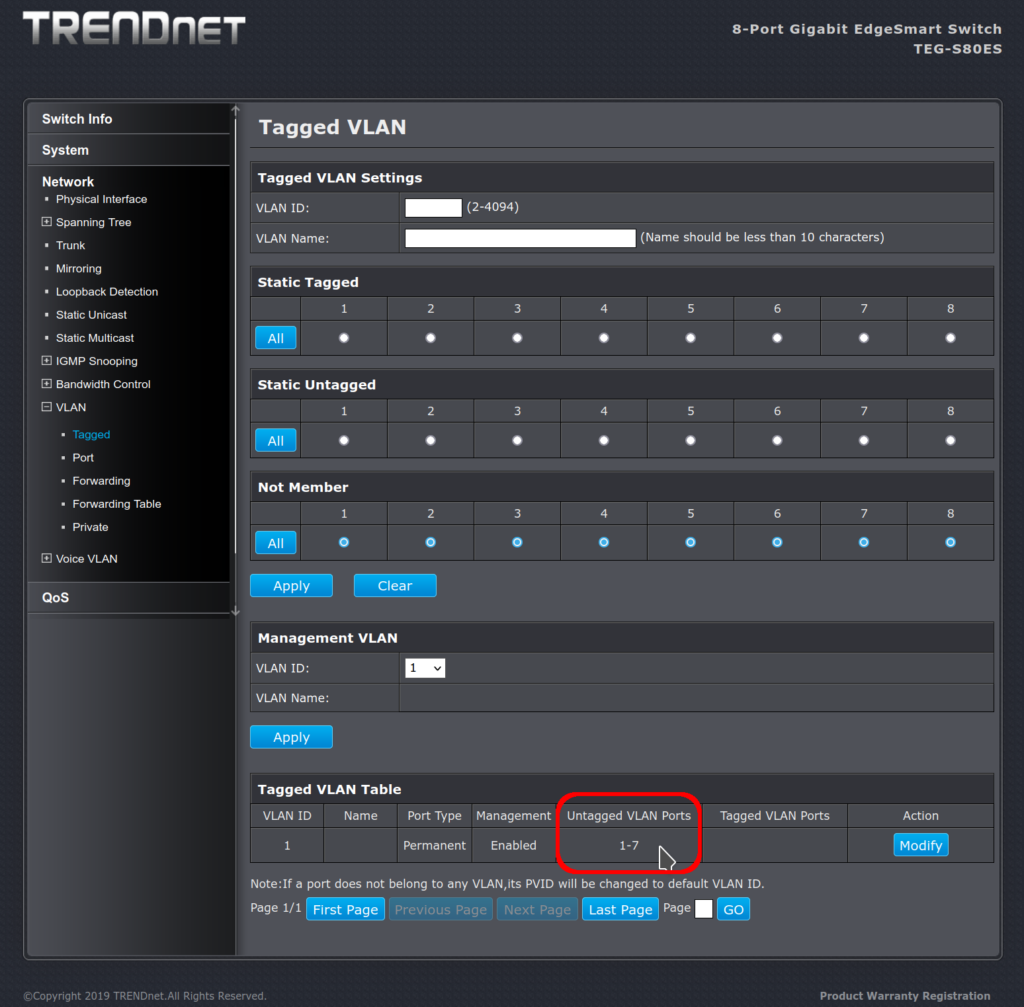
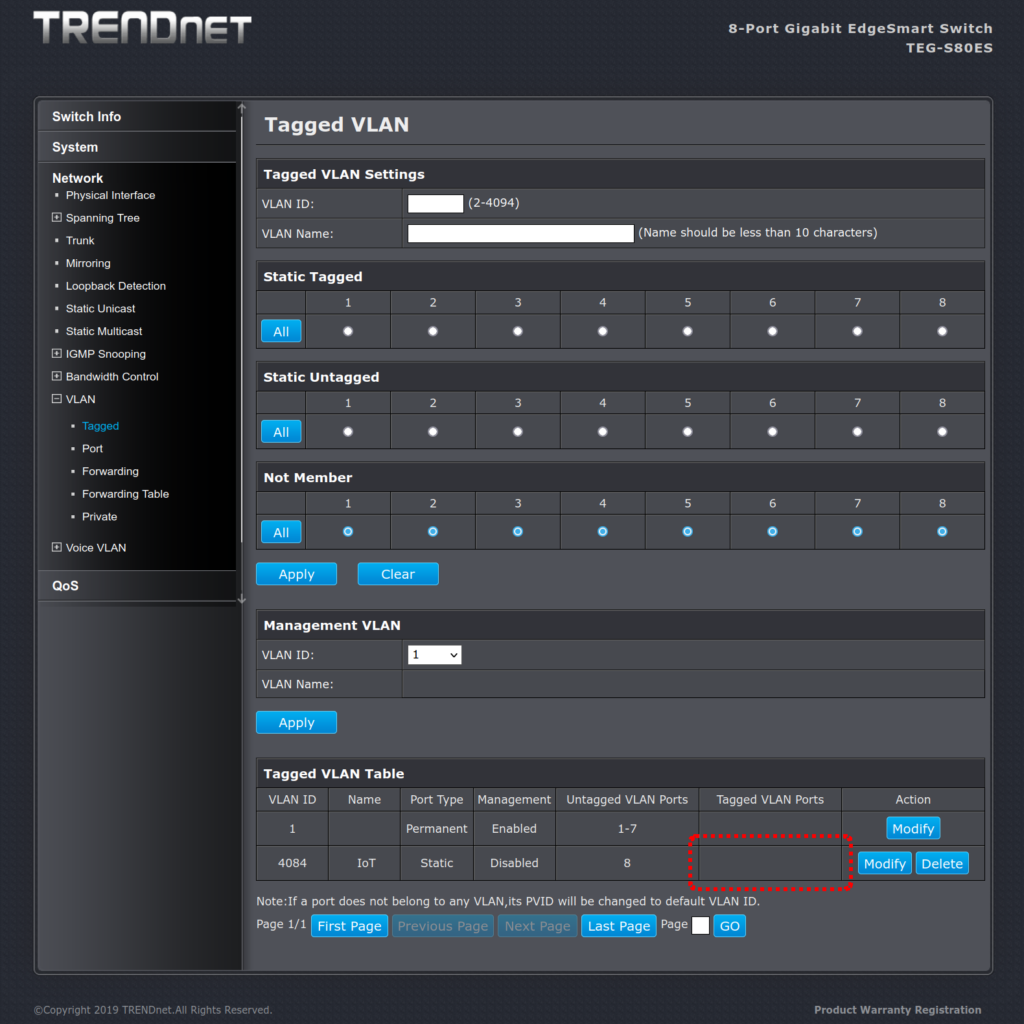
We’re almost there. The configuration will now look like this:
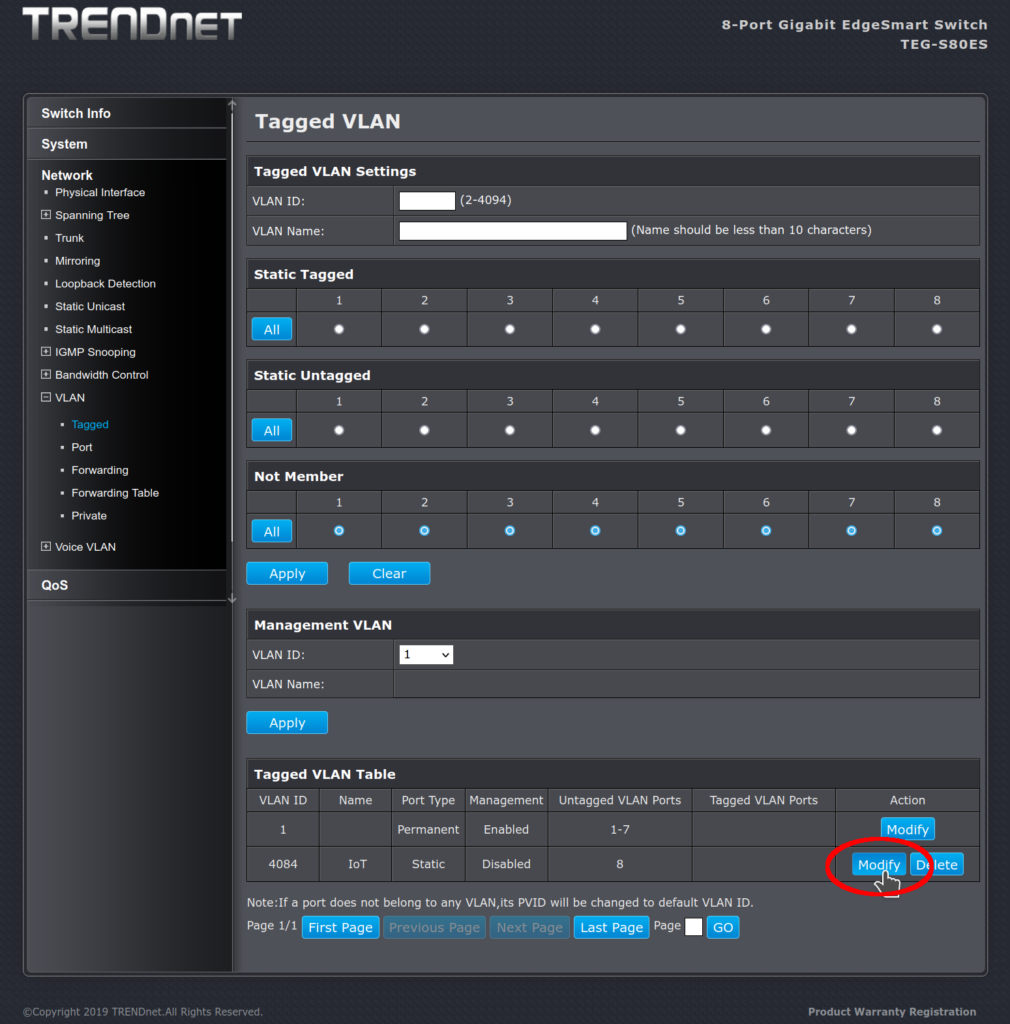
Step 3: add the trunk to the uplink port
Modify VLAN 4084:
Make the modification: frames to port 1 should be tagged with VLAN 4084. This is because I chose port 1 as the uplink port. The uplink is the trunk connection to the core of the network. But when the switch presents the frame on port 8, the tags should be stripped off (“un” tagged):
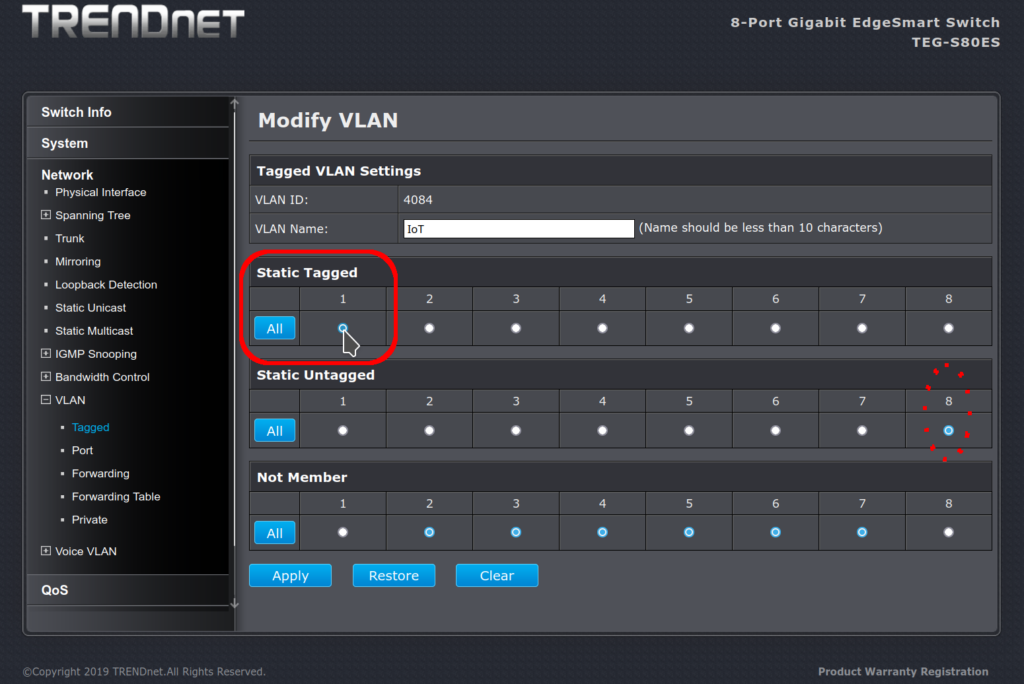
Apply our changes, save the configuration, and reboot the device on port 8.
If our VLAN 4084 is otherwise configured correctly, our IoT device should now be on the IoT VLAN. Enjoy.
As painful as this was, I wish I’d bought something else with a better web admin interface than these Trendnet switches. Ultimately, they worked, but man I wasted a lot of hours trying to get them to work. That was four hours of my life I’m not getting back. I should have spent the extra $15 for a switch with software / documentation that doesn’t suck.